Risk Management
Written By Emama Platform
Last updated 3 months ago
In this section:
How does Risk Management work?
The Risk Management module is a set of hard rules that operate at the system level. When a rule is triggered, the action is blocked — not warned about, not flagged for review. Blocked.
The key idea: set your rules when you're thinking clearly, and let them protect you when you're not. Every rule addresses a specific failure mode — overtrading, oversizing, revenge trading, averaging into a hole — that most traders have experienced firsthand.
Rules can be configured individually. You don't have to turn everything on at once. Start with the rules that address your most consistent weak points.
There are also 5 built-in templates (conservative, moderate, aggressive, scalping, volume limit and custom) so you can get a sensible baseline in place quickly.

→ See Risk Management for a full guide on every rule and how to think about configuring them
What Risk Management rules are available?
Position rules
Only trades with stop loss — every order must include a stop loss or it won't go through
Maximum leverage — hard ceiling on leverage for futures trades
Maximum risk per position (% of deposit) — caps the potential loss of any single trade
Manual trade closing prohibited — if a position has an active SL or TP, it must exit through those levels
Exposure and loss rules
Daily loss limit (% of deposit) — circuit breaker that stops new trades once a daily loss threshold is reached
Limit on concurrent open trades — caps how many positions can be open at the same time
Filter by ticker volume — restricts tradeable assets to those above (or below) a volume threshold
Frequency and time rules
Limit on daily trade openings — maximum new positions per day
Daily terminal hours limit — maximum trading session length from first trade of the day
Weekly trading days limit — maximum number of active trading days per week
Averaging rules
Daily averaging limit — caps total averaging actions per day across all positions
Max averages and percent per order — limits how many times a single position can be averaged, with per-average size caps
Market condition filters
ADP / TD limit (Long) — defines market-wide conditions that must be met before longs are allowed
ADP / TD limit (Short) — same logic for short entries
→ See Risk Management for detailed explanations of each rule and how to configure them
How do I set a daily loss limit?
Open Terminal page and go to Risk Management tab below the graph
Click Configure RM, create an empty template and Enable the Daily loss limit rule
Enter the threshold as a percentage of your deposit (e.g., 3% means if your potential losses reach 3% of your deposit in a day, no new trades can be opened)
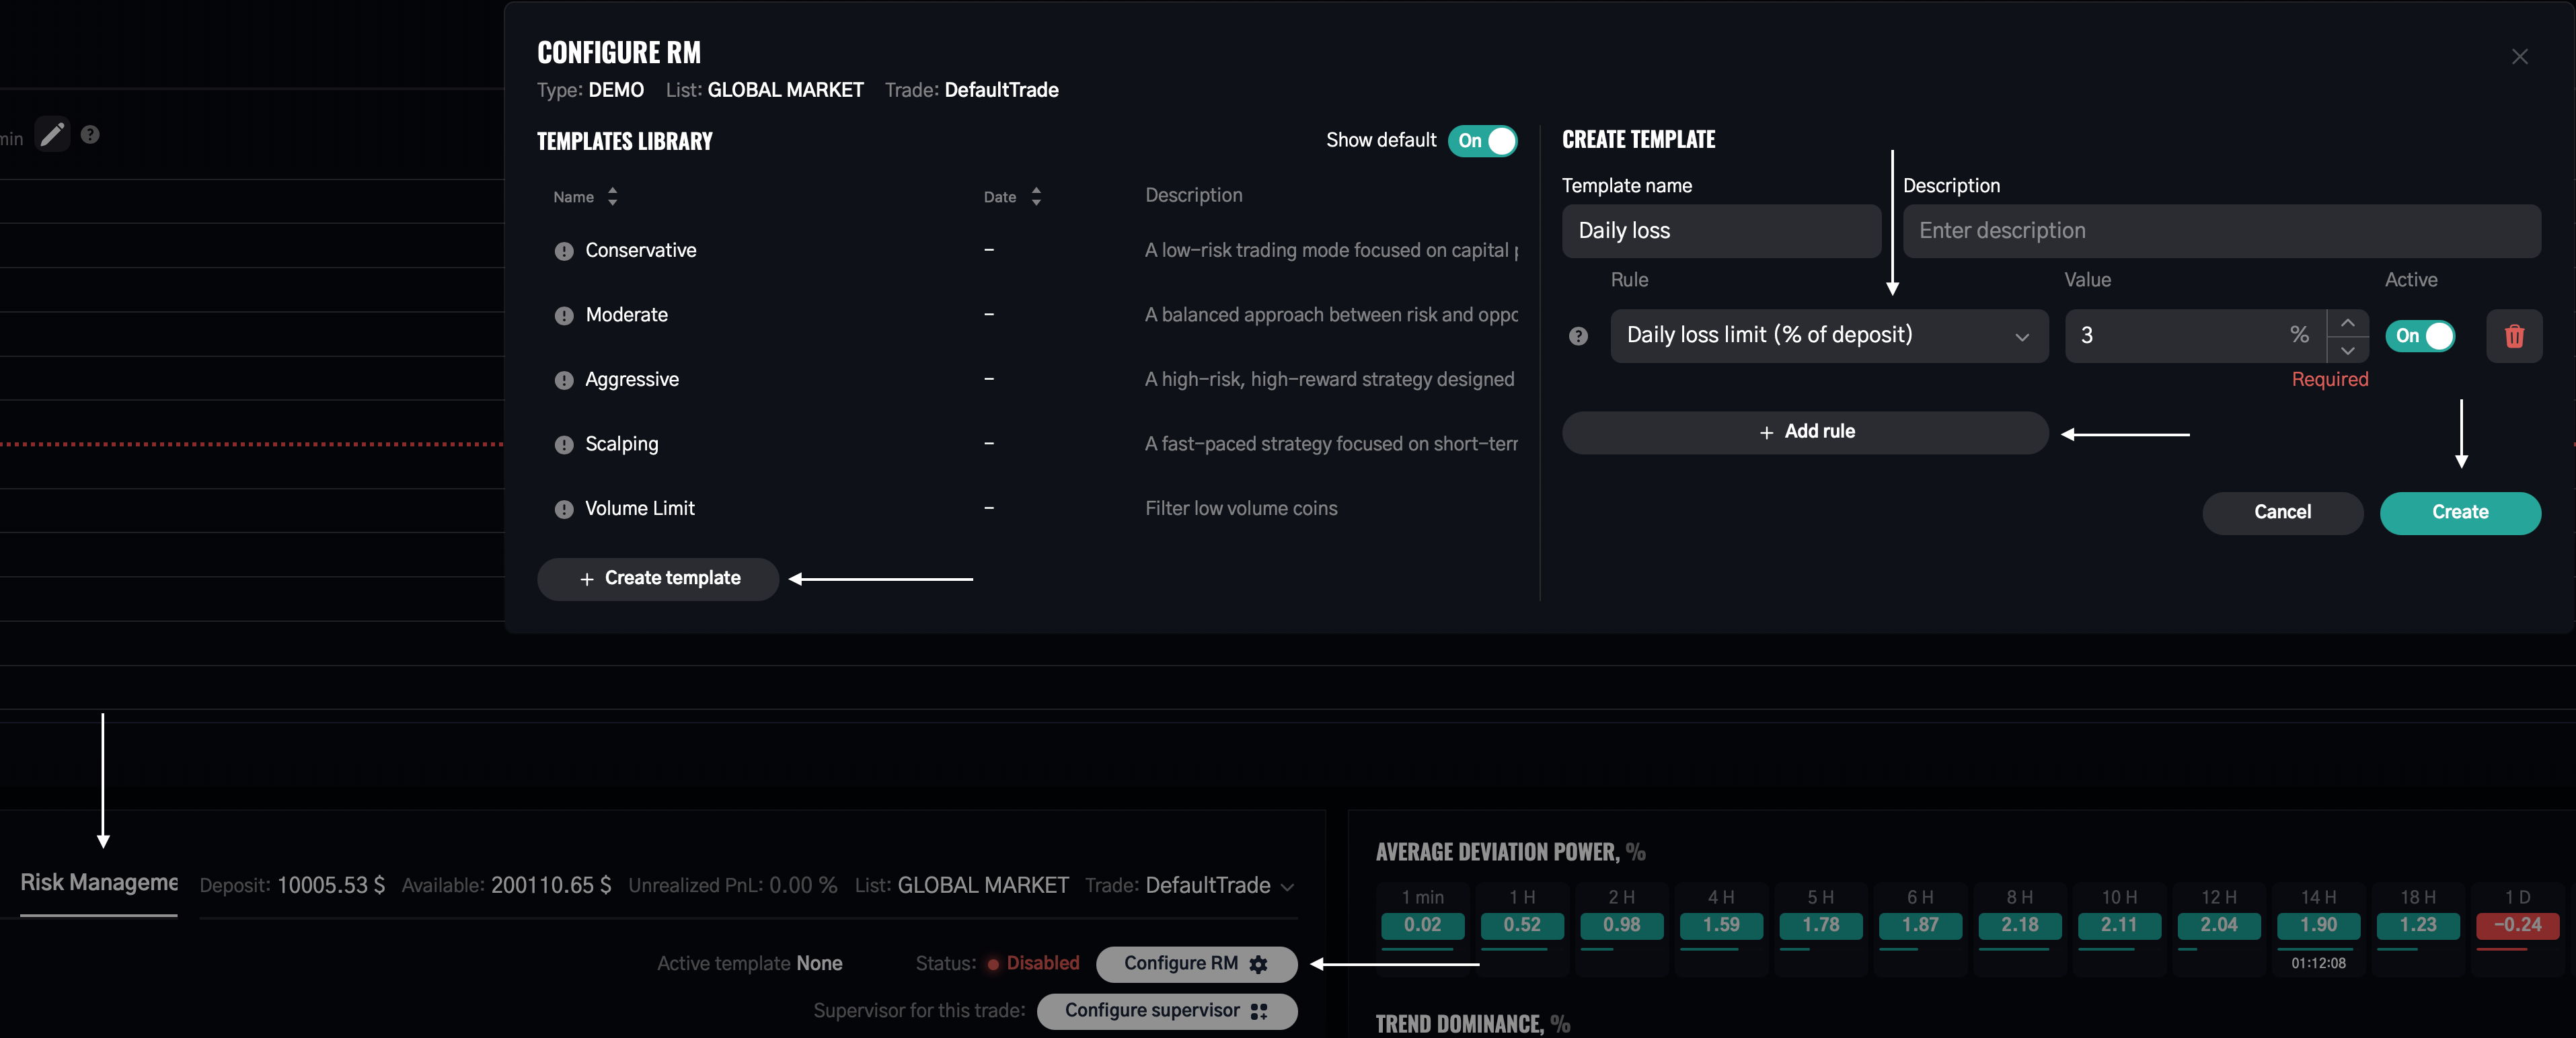
How it works: the terminal continuously calculates your combined potential loss across all open positions plus any new order you're attempting. The moment that total would exceed your threshold, the order is blocked.
This is your circuit breaker for losing days. The most damaging trading sessions typically start as normal losing days that escalate because the trader keeps trying to recover. This rule removes that option automatically.
→ See Risk Management for a full breakdown of all loss and exposure rules
What is the ADP/TD market condition filter?
This rule gates directional entries based on real market conditions — not just your setup, but the broader market context the terminal is actually reading.
For longs: you define conditions using ADP and Trend Dominance values across specific timeframes. Example: "ADP on 1H must be above 0 AND Trend Dominance on 15m must be above 50%." If those conditions aren't met, long entries are blocked.
For shorts: same logic applied in reverse.
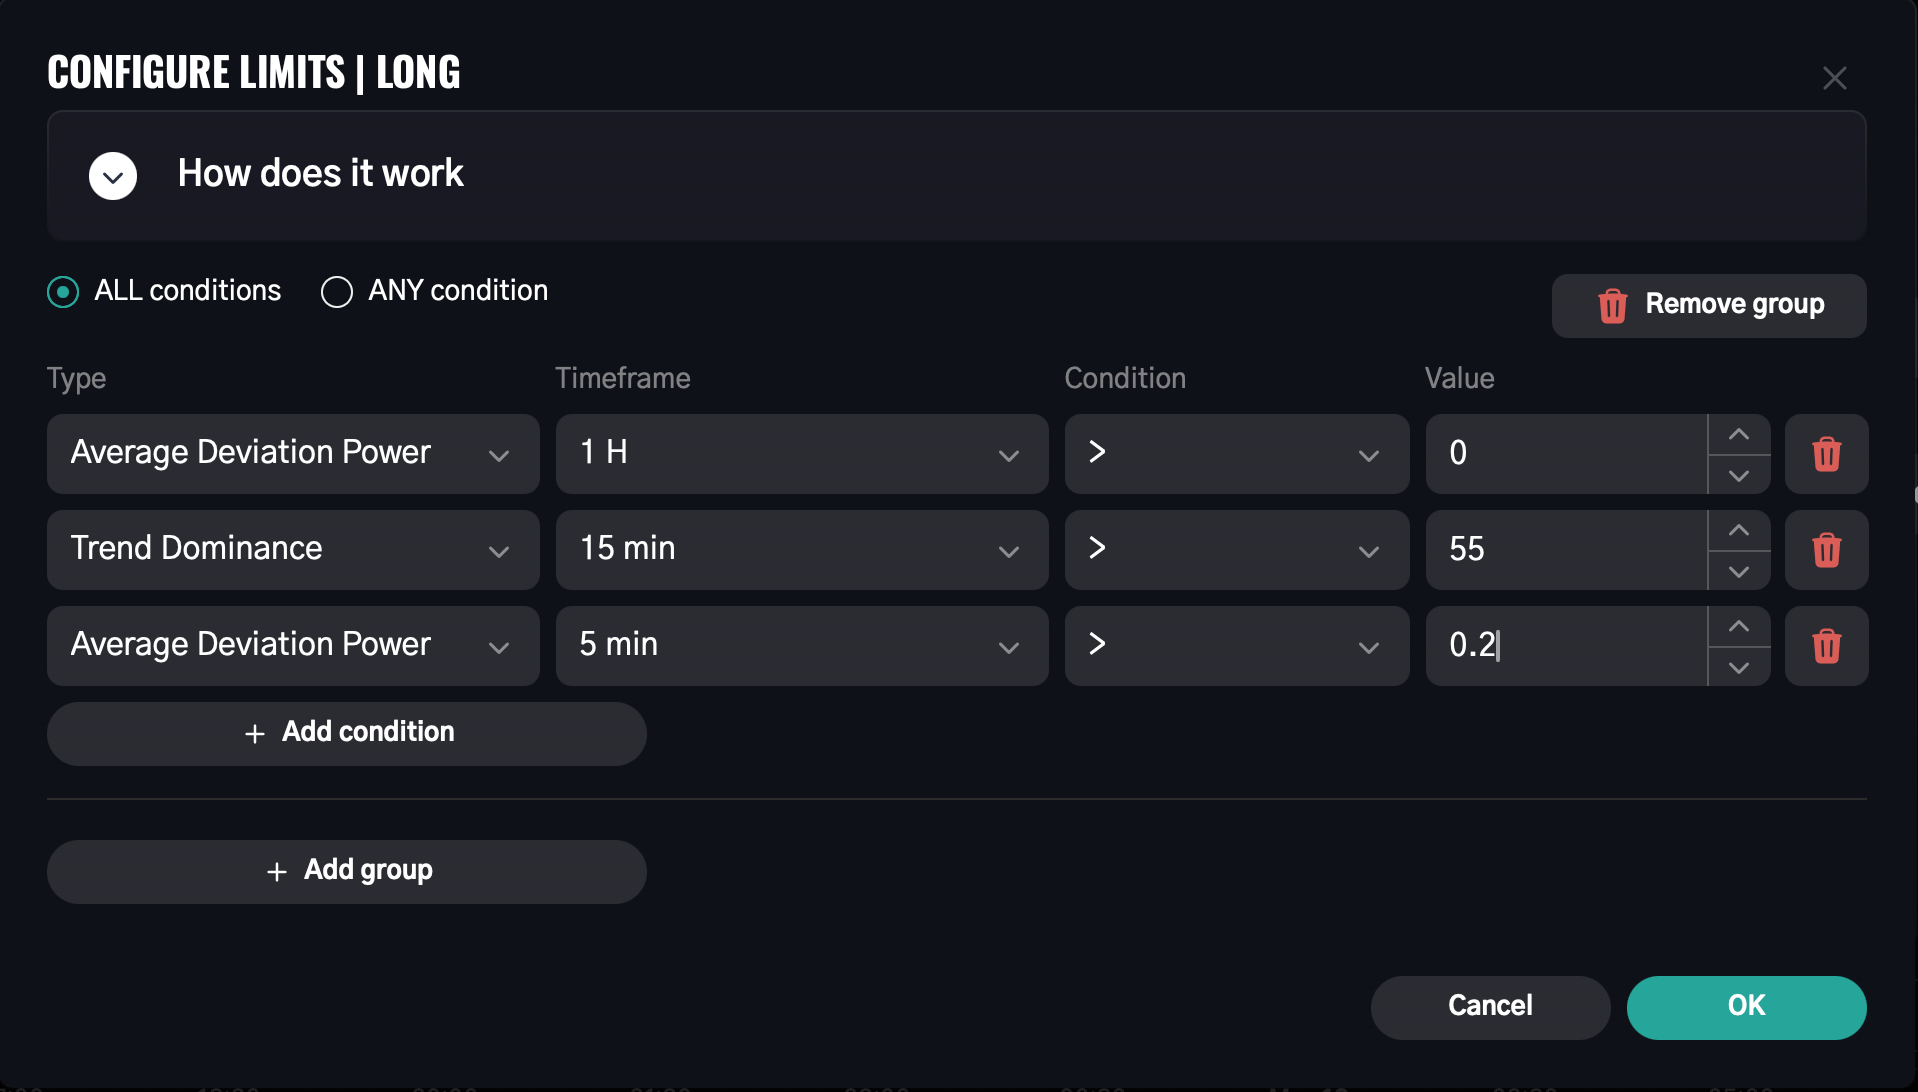
You can build multi-condition groups with AND logic (all conditions must be true) or OR logic (any one condition is sufficient).
Why it matters: this rule prevents you from entering a long into a market that's structurally weak — even when your individual setup looks good. It aligns your trades with what the broader market is doing, which is one of the most reliable ways to filter out low-probability entries.
→ See Risk Management for full configuration details · See Introductory Guide for a deeper explanation of ADP and TD